Auto Mask
How to Color Grade in Final Cut Pro 12 (Step-by-Step Guide)
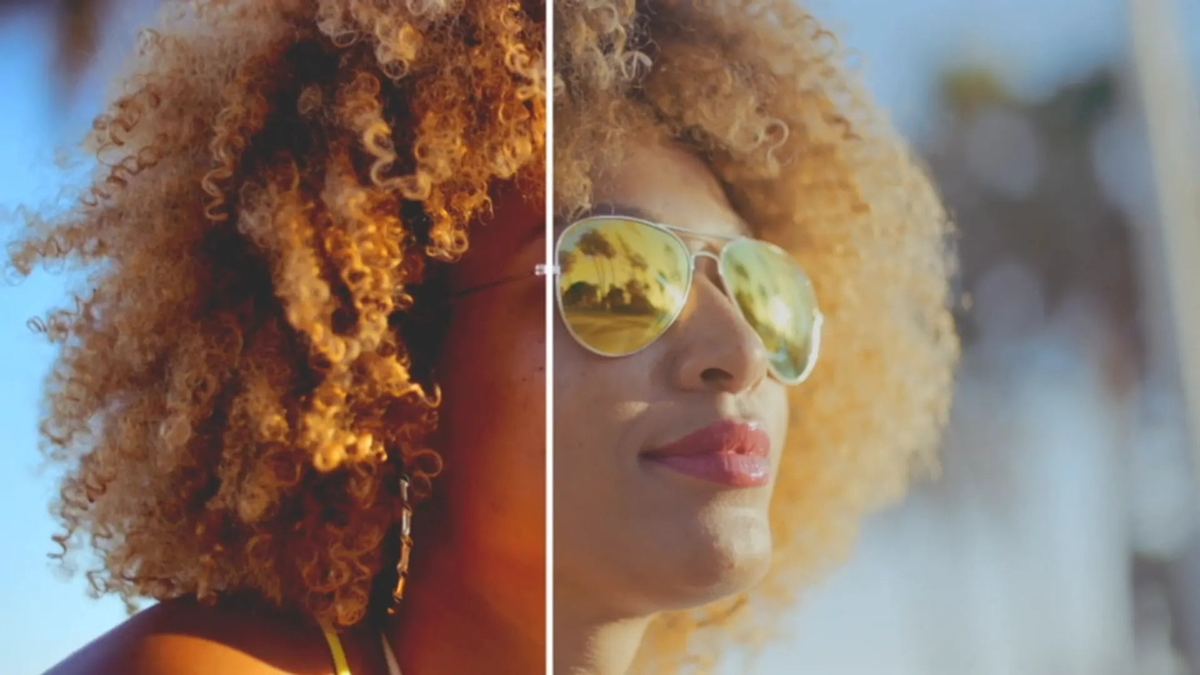
Quick answer: To color grade in Final Cut Pro 12, work in three passes. First correct each clip (camera LUT for log footage, exposure, white balance), then match your shots, then grade the look with Color Wheels, Color Curves and Hue/Saturation Curves, using masks to target specific areas. Finish by checking the video scopes and copying the grade to the rest of the scene. Final Cut Pro 12.3 added two big helpers for this: the all-new Match Color tool and Auto Mask.

Key takeaways
- Work in order: correct first, then grade, then finish. A creative look on top of an uncorrected clip is hard to control.
- All color tools live in the Color inspector. Choose Window > Go To > Color Inspector (Command-6).
- New in Final Cut Pro 12.3: Match Color (Option-Command-M) matches a clip to any reference frame, and Auto Mask isolates skin, hair, clothing, skies and more without manual tracking.
- Use several small corrections instead of one big one, and use masks to limit each to the part of the image it's for.
- Trust the video scopes (Command-7) more than your eyes, then copy the finished grade with Paste Attributes.
What's new for color in Final Cut Pro 12
Final Cut Pro 12.0 (January 2026) focused on search and editing, and 12.4 (September 2026) added Cinematic mode editing and fixes. The color news arrived in Final Cut Pro 12.3 (June 30, 2026). According to Apple's release notes, it added:
- Match Color, an all-new tool that matches your video's color across different cameras, lighting conditions and cinematic styles. After it matches, you get a full set of light and color sliders to refine the result.
- Auto Mask, which analyzes your video and isolates recognized objects (people, facial features, hair, skin, clothing, skies, foliage and animals) so you can color correct just that part, with no manual tracking.
Both sit on top of the color tools Final Cut Pro already had: Color Board, Color Wheels, Color Curves, Hue/Saturation Curves and Color Adjustments, plus color masks, shape masks, the Magnetic Mask, LUTs, adjustment clips and HDR support. This guide uses all of them in the order you'd actually use them.
Before you start: set up for grading
- Open the Color inspector. Select a clip and choose Window > Go To > Color Inspector (Command-6). The pop-up menu at the top lists the corrections on the clip and, under Add Correction, every correction you can add.
- Show the scopes. Choose View > Show in Viewer > Video Scopes (Command-7). You can show up to four scopes at once, such as the waveform for brightness and the vectorscope for color. (Apple: Display video scopes)
- Use a color layout. Apple suggests the predefined Color & Effects workspace layout, or your own custom one.
- HDR or log footage? Set the library's color processing to Wide Gamut HDR. Apple notes that camera LUTs keep the full dynamic range of log media only when the library is set this way; otherwise the media is tone mapped down to SDR. (Apple: Use wide-gamut HDR color processing)

Step 1: Correct each clip
Correction means making the clip look natural and neutral: right exposure, right white balance, no color cast. Apple's manual color correction workflow starts here, with a reference shot: usually the wide shot of a scene, which you correct first and then match everything else to.
1a. Convert log footage with a camera LUT
Log footage looks flat and gray on purpose. When you import it, Final Cut Pro reads the metadata and applies the matching built-in camera LUT automatically (Apple Log, Apple Log 2, ARRI, Blackmagic, Canon, DJI, Fujifilm, Nikon, Panasonic and Sony are all listed). If it didn't, select the clips, open the Info inspector, choose General, Extended or Settings from the Metadata View menu, and pick the right option from the Camera LUT pop-up menu. Camera LUTs apply to every instance of the clip in the library, and they're applied before any clip effects. (Apple: Apply LUTs)
1b. Set the blacks and whites
Apple calls this the first half of primary correction: map the darkest part of the image to 0 and the brightest to 100 on the waveform, so you use the full range without clipping. The easiest tool is Color Adjustments (Edit > Add Color Adjustment, or Option-Command-O). It has Exposure, Contrast, Brightness, Saturation, Highlights, Shadows, Warmth and Tint controls, and it's designed for HDR clips while also working on SDR. (Apple: Use the Color Adjustments effect)
Want a starting point? Click Enhance Light and Color in the Color Adjustments effect. It uses machine learning to improve the tonal range and remove any visible color cast. You can then fine-tune it.
1c. Fix the white balance
The second half of primary correction is balancing red, green and blue so whites look white. Choose Modify > Balance Color (Option-Command-B), then pick White Balance from the Balance Color menu in the Video inspector and click something white in the viewer. Our white balance guide walks through it step by step, including the mistakes to avoid. You can also fine-tune with the Temperature and Tint sliders at the bottom of the Color Wheels effect.
Step 2: Match your shots with Match Color (new in 12.3)
Once your reference shot looks right, make the other shots match it. Match Color is the fastest way, especially with footage from different cameras. Here's how it works, from Apple's Match Color guide:
- Select the clip you want to change and put the playhead on a representative frame.
- Choose Modify > Match Color (Option-Command-M). You can also pick it from the Enhancements menu below the viewer, from Add Correction in the Color inspector, or drag the Match Color effect from the Effects browser.
- The viewer splits: your clip on the right, whatever you skim on the left. Skim any clip in the timeline or browser, and click a frame to preview its look on your clip. Try as many as you like.
- Click Apply Match.
- Refine it in the Color inspector. Match Color gives you Light controls (Exposure, Contrast, Brightness, Highlights, Black Point, Shadows, Super Highlights) and Color controls (Saturation, plus Warmth and Tint separately for highlights, midtones and shadows), and a Mix slider to blend it with the original.
Two useful tips from Apple: you can import a still image with a look you like and match to it, even if it has nothing to do with your project. And to compare, turn the Match Color checkbox off and on in the Color inspector. Note that choosing Match Color from the Modify or Enhancements menu replaces any existing Match Color effect on the clip; to stack another one, add it from the Effects browser or the Color inspector.
Doing it by hand? Apple's manual workflow is to compare each shot with the reference using the scopes, and adjust until the color, blacks and whites line up. The comparison viewer helps here.
Step 3: Grade the look
Now the creative part. Grading is where you choose a mood: warmer, cooler, more contrast, softer shadows, richer greens. Apple's advice is worth repeating: you don't have to do everything with one correction. Add a correction for each job, and name them (you can rename corrections in the inspector) so you know what each one does.

Color Wheels: the main grading tool
Add it from the Color inspector's pop-up menu (Add Correction > Color Wheels). There are four wheels. Global affects the whole image; Shadows, Midtones and Highlights each affect their own range. (Apple: Use the Color Wheels effect)
- Drag the center control of a wheel to push color into that range. You can also nudge it with the arrow keys.
- Drag the slider on the right of a wheel for brightness, and the slider on the left for saturation.
- Hold Option while you drag for fine adjustments.
- At the bottom you'll find Temperature, Tint, Hue (rotates every hue around the wheel) and Mix.
A simple example of a classic look: push the Shadows wheel slightly toward blue and the Highlights wheel slightly toward orange, then pull Mix back until it feels natural. Watch the vectorscope: Apple points out that moving a wheel's control moves the color in the vectorscope in the same direction.
Color Curves: contrast and precise channel control
Color Curves has a Luma curve plus Red, Green and Blue curves. Click a curve to add a control point, then drag up to increase or down to decrease. A gentle S-shape on the Luma curve (lower the dark end a little, raise the bright end a little) adds contrast. Something Apple calls unique to Final Cut Pro: use the eyedropper at the top of a curve to pick any custom color in the viewer and adjust that. (Apple: Use the Color Curves effect)
Hue/Saturation Curves: change one color without touching the rest
This is the tool for "make the sky a deeper blue" or "tone down that bright red jacket." There are six curves, including Hue vs Hue (change a color), Hue vs Sat (change its saturation), Hue vs Luma (change its brightness) and Luma vs Sat, which Apple suggests for special looks and for reducing oversaturation. Click a curve's eyedropper, click the color in the viewer, then drag the control point. (Apple: Use the Hue/Saturation Curves effect)
Custom LUTs for a look
Besides camera LUTs, Final Cut Pro supports custom LUT effects for stylized looks. In the Effects browser, select the Color category and double-click Custom LUT. In the Video inspector, choose "Choose Custom LUT" from the LUT menu, pick your .cube file, then set the Input and Output color spaces. Unlike camera LUTs, custom LUT effects can sit anywhere in the clip's effect order, so you can place your corrections before or after them. (Apple: Apply LUTs)
Step 4: Target parts of the image with masks
Masks limit a correction to one area. Apple's example: three separate corrections for the green grass, the highlights in the trees and an actor's red lipstick. Every color correction can use these masks:
Auto Mask (new in 12.3)
Auto Mask is the fastest way to isolate something Final Cut Pro recognizes. Following Apple's Auto Mask steps:
- Add a color correction to the clip (for example, Color Adjustments) and put the playhead on a frame that shows what you want to mask.
- Open the Video inspector (Command-4).
- Click the Add Intelligent Mask button to the right of the effect name and choose Auto Mask. A menu shows thumbnails of the mask types detected in the frame.
- Move the pointer over the viewer and click what you want, or tick the thumbnails in the menu. You can select more than one.
- Click Add Auto Mask. Your correction now only affects the masked area.
Refine the edge with Shrink/Expand, Erode and Blur. Practical uses: brighten just a face, cool down only the sky, desaturate clothing that's pulling attention, or warm up skin without touching the background. (Apple: Use the Auto Mask)
If Auto Mask doesn't recognize what you need, use the Magnetic Mask (added in Final Cut Pro 11), which isolates people, objects and shapes and tracks them using machine learning.
Color masks and shape masks
- Color mask: in the Color inspector, hover over the correction's name, click the Apply Effect Masks button and choose Add Color Mask. Click a color in the viewer with the eyedropper, then choose Inside (correct that color) or Outside (correct everything else). Pick 3D for a Softness slider or HSL to set hue, saturation and luma ranges separately. Shift-drag adds shades; Option-drag removes them. (Apple: Add a color mask)
- Shape mask: draw an area by hand, for a vignette or to brighten one corner. Add a shape mask to a color mask to limit it to one part of the frame. (Apple: Add shape masks to a color mask)
Step 5: Finish and apply the grade everywhere
- Check the scopes. Make sure the waveform isn't crushing your blacks or clipping your whites, and that the vectorscope doesn't show colors pushed too far.
- Keep it broadcast safe. If a grade pushes levels too far for Rec. 709 delivery, Apple recommends the Broadcast Safe effect in the Effects browser.
- Copy the grade. Select the graded clip, press Command-C, select the clips to match, then choose Edit > Paste Attributes (Shift-Command-V) and tick the corrections to paste. Apple notes Match Color and Balance Color can be copied this way too.
- Save it as a preset. Combine several corrections into one effects preset so you can reuse the look. (Apple: Manual color correction workflow)
- Use an adjustment clip for global looks. Since Final Cut Pro 11.1 you can put color corrections on an adjustment clip above the timeline to affect a whole range of clips at once. That's a tidy way to keep per-clip correction separate from the overall look.
Which tool for which job?
| Job | Best built-in tool |
|---|---|
| Convert log footage | Camera LUT (Info inspector) |
| Exposure, contrast, HDR clips | Color Adjustments (Option-Command-O) |
| Remove a color cast | Balance Color > White Balance (Option-Command-B) |
| Match two shots | Match Color (Option-Command-M) |
| Creative look in shadows/midtones/highlights | Color Wheels |
| Fine contrast, single channels | Color Curves |
| Change one color | Hue/Saturation Curves |
| Correct only skin, sky, hair, clothing | Auto Mask on a correction |
| Same look across a sequence | Paste Attributes, presets, adjustment clip |
Speed it up with presets: Quick Color and Finishing Plugin 2
The built-in tools can do almost anything, but building a look from scratch on every project takes time. If you'd rather start from a good-looking preset and adjust a few easy controls, these two plugins are built for that. Use them after Step 1, on clips that are already corrected.
Quick Color: fast looks with on-screen wheels
Quick Color gives you a range of ready-made, fully customizable looks, including soft "milky" shadow looks that Final Cut Pro doesn't offer on its own. Every preset has the same controls, just set up differently, and the Custom preset starts neutral.
- On-screen color wheels: grade shadows, midtones and highlights right in the viewer.
- Milky shadows: set Raise.Shadow.Floor to about 20 and lower Shadows.Level; Lower.Highlight.Ceiling softens the top end.
- Levels and color balance for shadows, midtones and highlights, each with an amount control, plus an overlay layer with blend mode, blur and glow.
- Fast workflow: select several clips and double-click a preset to apply it to all of them.
Find it in the Effects browser under My FCPeffects, and turn off Show.Color.Wheels before you export.


Finishing Plugin 2: the final polish in one effect
Finishing Plugin 2 fits Step 5. It puts levels, vibrancy, detail, softening, saturation, hue and color balance in one effect, each for the whole image or just the shadows, midtones or highlights.
- Look presets: start from a ready-made look, or from Default, which changes nothing until you adjust it. Save your own with Save Effects Preset.
- Raise.Shadow.Floor for a milky shadow look, and a Blockbuster.Look option in the color balance section.
- Reframing with on-screen position, scale and rotation, plus framing guides and a warning layer that shows any gaps. Turn the guides off before export.

Both plugins work with Final Cut Pro 12 on Intel and Apple silicon Macs, and each costs $20. Quick Color and Finishing Plugin 2 are also part of the MEGA BUNDLE: all of our plugins (over 80) for $80. And if you want to try something first, grab our free Final Cut Pro plugins, including the White Balance Plugin.
FAQ
What's the difference between color correction and color grading?
Correction makes footage look accurate and consistent: proper exposure, neutral white balance, matching shots. Grading is the creative step on top: the mood or style you choose. Correct first, then grade.
What's new for color grading in Final Cut Pro 12?
Final Cut Pro 12.3 added Match Color, which matches a clip to any reference frame and then gives you sliders to refine it, and Auto Mask, which isolates recognized things like skin, hair, clothing, skies and foliage so you can correct them separately without tracking.
What's the shortcut for Match Color?
Option-Command-M (Modify > Match Color). Skim to a frame with the look you want, click it, then click Apply Match.
How do I open the color tools in Final Cut Pro?
Select a clip and press Command-6 (Window > Go To > Color Inspector). Add corrections from the pop-up menu at the top of the Color inspector, or from the Color category of the Effects browser.
Should I use a LUT or grade by hand?
For log footage, start with the camera LUT so the image looks normal. After that, a custom LUT can give you a quick look, but Color Wheels, Curves and Hue/Saturation Curves give you more control. Many editors use both.
How do I apply the same grade to many clips?
Copy the graded clip, select the others and choose Edit > Paste Attributes (Shift-Command-V). For a look across a whole section, put the correction on an adjustment clip above the timeline.
Can I grade HDR in Final Cut Pro?
Yes. Set the library and project to Wide Gamut HDR. The Color Adjustments effect is designed for HDR clips, and the scopes help you watch levels. See Apple's HDR guide.
Keep learning
New to color? Start with our beginner's guide to color grading in Final Cut Pro, then nail the first correction step with how to white balance in Final Cut Pro. When you're ready to grade faster, Quick Color and Finishing Plugin 2 are there to save you time.